


Tip: Have team members and want to add classes? Go to Creating classes with team members.
When setting up a new class, you will need to provide the following information.
Note: You can create class passes and membership packages that are eligible for particular classes.
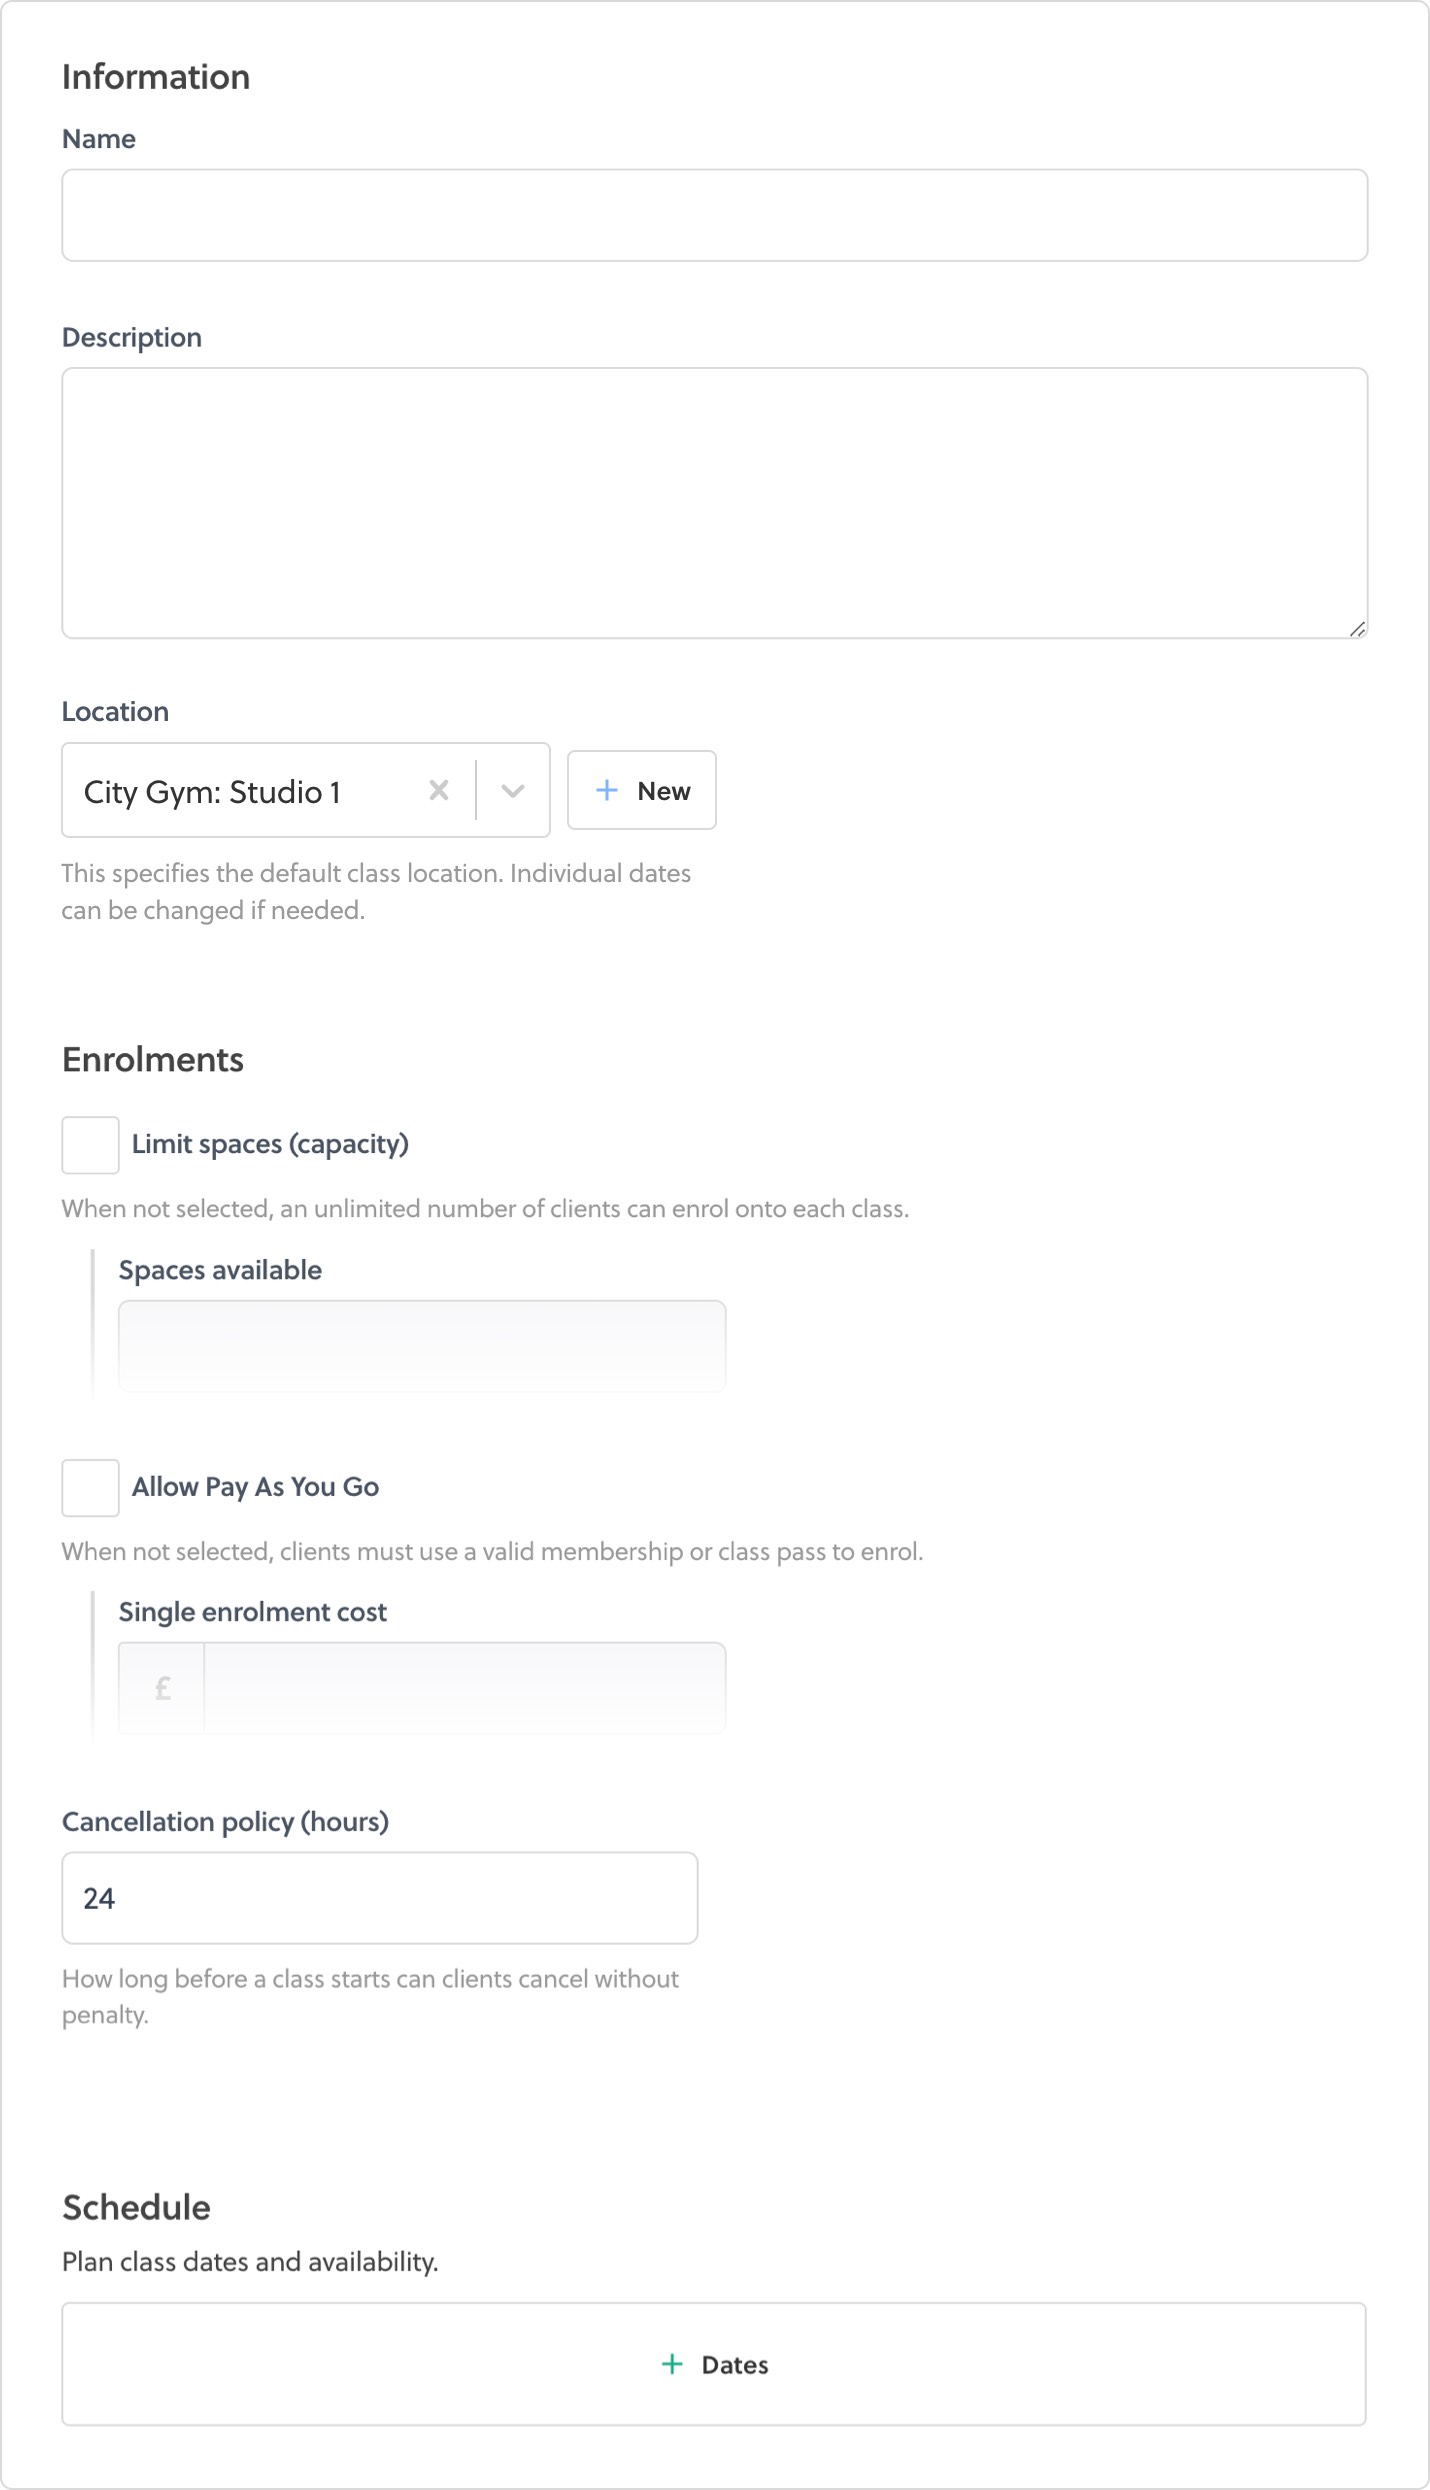
Information
Class name and description
Give your classes a name that clients will recognise as this will be displayed when the class is listed on your schedule. This is a good place to specify details like the ability level (beginners/advanced) or any age restriction (under 12's). However there is no need to include the class location as this will be shown separately.
Use the class description to provide more information to clients about the class. You could include information about the format, benefits of attending, required equipment, suggested attire, etc.
Class location
You can select any of the locations you've created in your account, or one of the pre-installed remote options. Whatever you select here will become the default location for all class dates you plan on your calendar, however you can move individual class dates to different locations if you need.
Read more about class locations.
Enrolments
Limit spaces (Capacity)
If your class requires a capacity limit due to space or equipment etc. enter it here to restrict the number of clients that can enrol.
Note: When a class is fully booked this will be displayed in the client area on the class schedule.
Tip: It is possible to edit individual class dates and change their capacity individually. However all newly created class dates will default to their parent class's capacity.
Allow pay as you go
For each of your classes you can choose whether to accept single enrolments. A single enrolment is when a client pays for classes one at a time (pay-as-you-go). If you are happy for clients to do this, select the option and specify the single class price. If you do not select this, clients must have a valid class pass or membership to enrol onto the class.
The option you choose here will apply to all dates you plan for this class.
Cancellation policy
Each class you create can have its own cancellation policy. This field will initially use the default cancellation policy from your organisation settings.
The class cancellation policy determines how many hours before the start of each class a client can cancel their enrolment without receiving the penalty of losing their enrolment payment or class pass/membership credit.
Schedule
It's possible to save a class without adding any dates to your calendar. Doing this will store all the class details but not create any entries on your client facing class schedule.
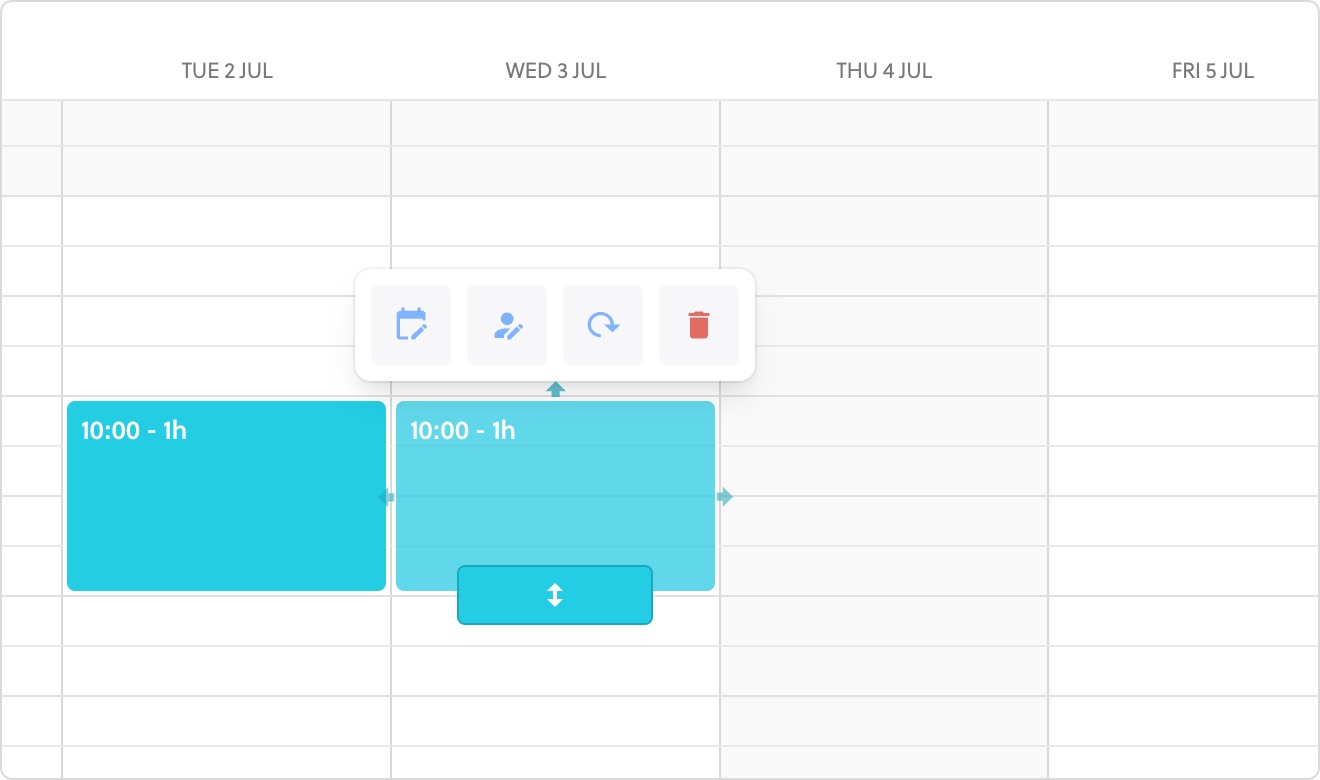
To add dates to the class, just click the '+ Dates' button. This will take you to your calendar and allow you to start planning when the class will take place. Simply click an empty part of your calendar to place a class date there. You can drag it to a new position if required or change it's length. You can also repeat a date, move it to a different week, or remove it completely.
Tip: You can add as many dates to a class as you wish, but remember that you will set any class pass or membership access rules based upon the parent class, so if you plan to target classes on different days of the week, or different ages groups separately, you should create a new class for each.
Once you have finished adding dates, click the green 'Review & save' button to add them to the class. This will return you to the class creation form.
Availability checker
While you are adding class dates to your calendar, we’ll also make sure you’re available when you need to be.
If you have holidays, appointments, or other events in your calendar that clash with the dates you are adding then we’ll let you know. This is most important when using the repeat option.
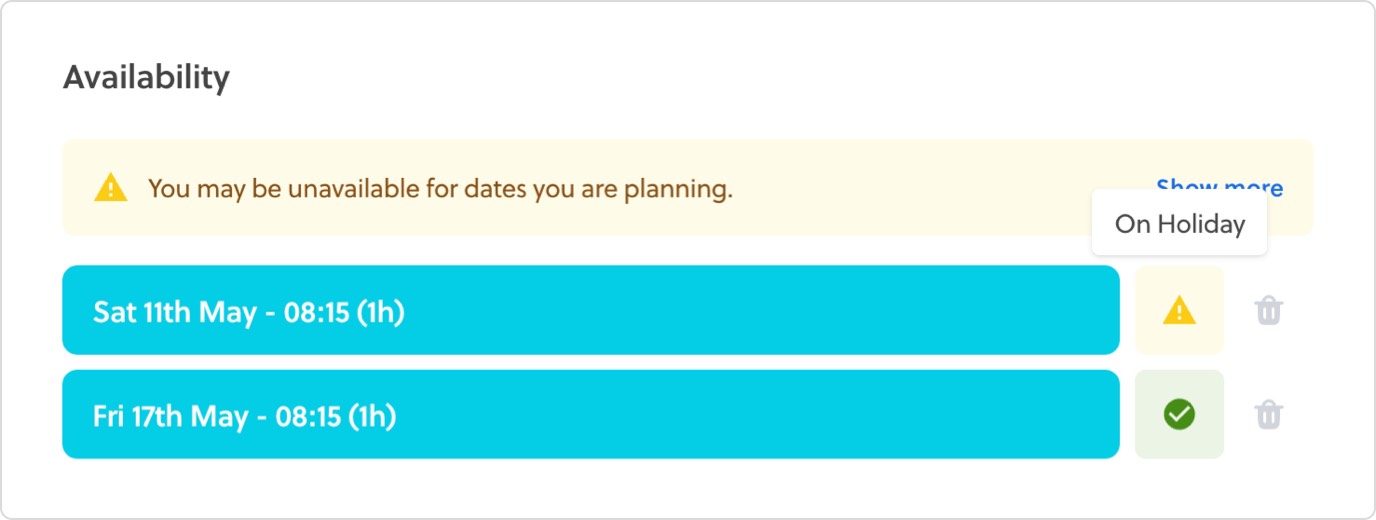
There are two types of schedule clash:
- Soft (yellow): The date you are planning is during a holiday already planned on your calendar. You can still save the date but you should double check you will be available to teach it.
- Hard (red): The date you are planning has clashed with another event on your calendar. This might be another class, a session or a personal appointment. You will not be able to save this new date without resolving the clash.