


You can add clients to your roster by:
In the top-right corner of the clients section is a '+ Client' button. This reveals a menu with two options;
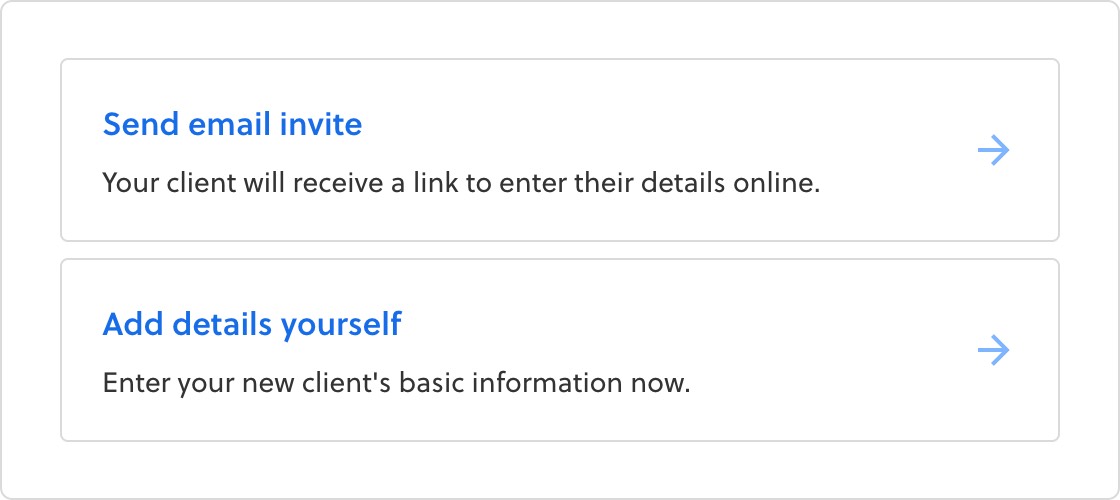
Sending an email invite
If you prefer not to use your public sign-up link, or you just want to direct individual clients to your sign-up process, then you can send them a personal invite.
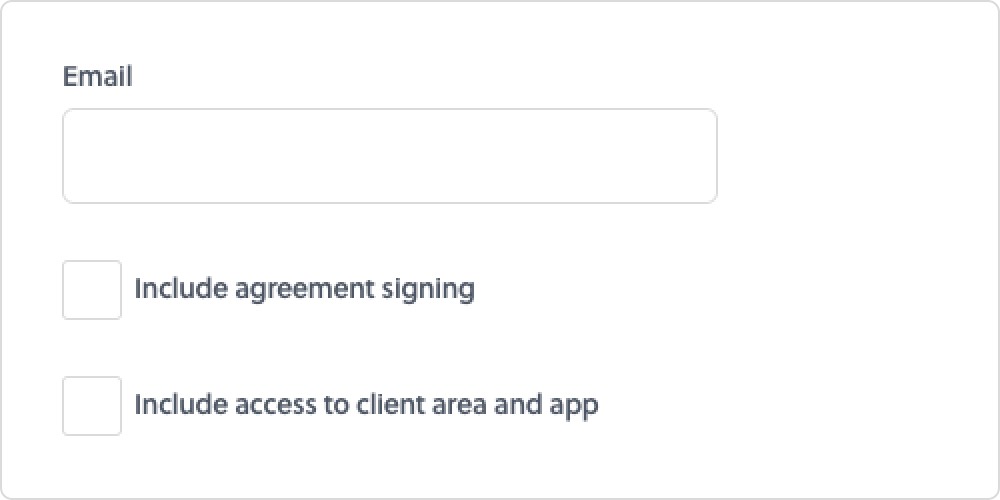
All you need to do is enter an email address and hit send. The client will receive an email directing them to your client area where their information will be collected. When a client completes the sign-up process you will receive a notification and their details will be in your Striive account waiting for you to review.
When inviting a client you can choose to have them sign one of your agreements and set a password. Setting a password allows them to immediately access your client area or app to make purchases and bookings. If clients sign up via your public sign up link their details will be sent to you to review before they can set a password. Once you have reviewed and accepted their information you can then invite them to set a password. Only then will they be able to make bookings and purchases.
Tip: Curious what the client sign up journey looks like? Find out here.
Note: A client who signed up using your public sign up link will not have immediate access to your client area. You must review and accept their information before inviting them to set a password. Only then will they be able to sign in to your client area or app and make bookings and purchases.
See previously sent invites
To see the invites you have sent out (and cancel one if necessary) visit the invites section. You can find this in the clients section beside 'Roster'. The invites shown here will also include any PAR-Q and agreement signing requests you have sent separately.

Note: For security reasons, all invites must be used within 14 days. If not they expire and you will need to send the client new one.
Adding their details yourself
If you already have a client's details in your possession, or for any reason they cannot sign themselves up, you have the option to add their details yourself.
When using this option you enter their personal information including email address and phone number. You can also manually set the date they became a client.
To add client details use the '+ Client' button in the top right hand corner, then select ‘Add details yourself’. You will then be presented with the below fields to be filled with your clients info:
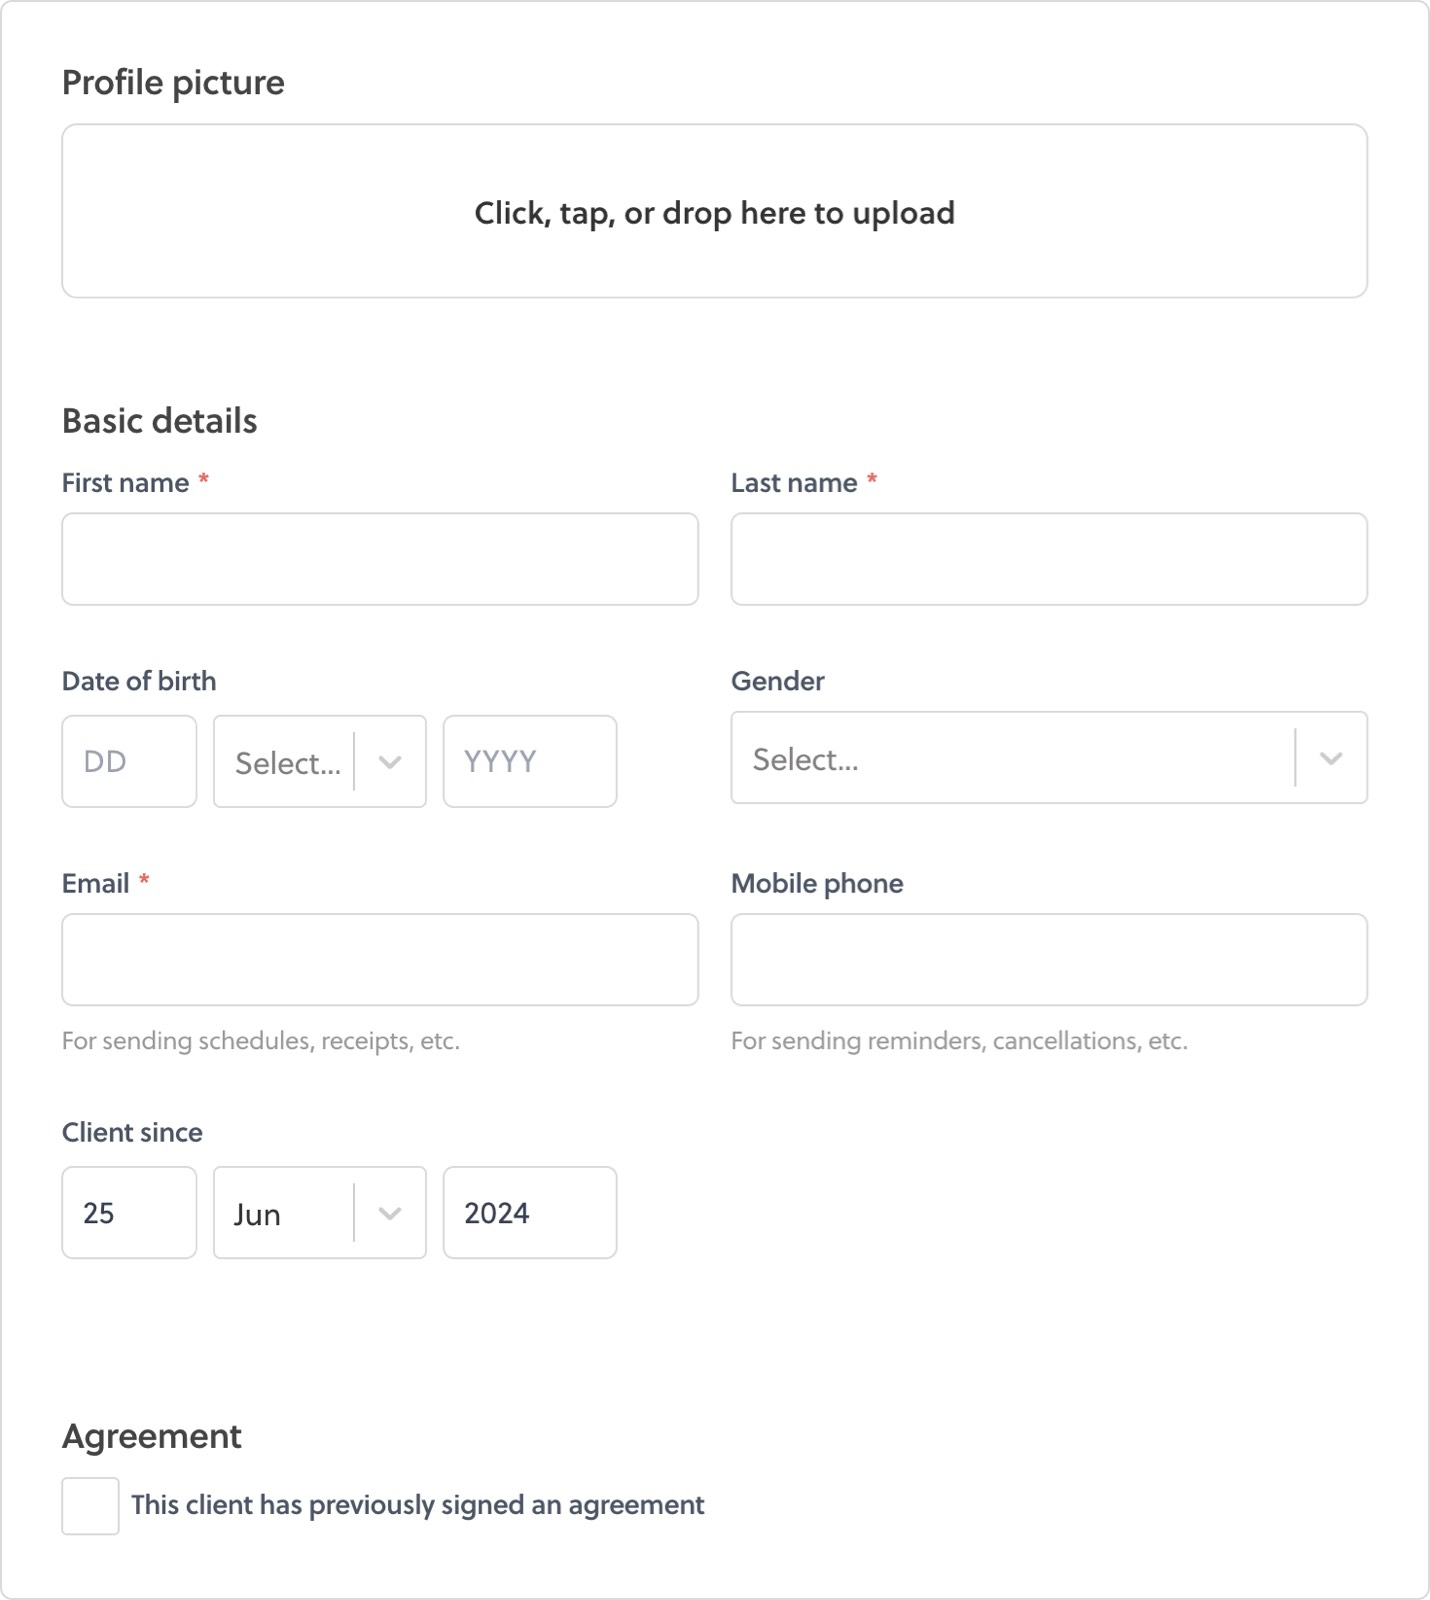
Note: The client photo you add here will not be seen by the client. It is for your reference only.
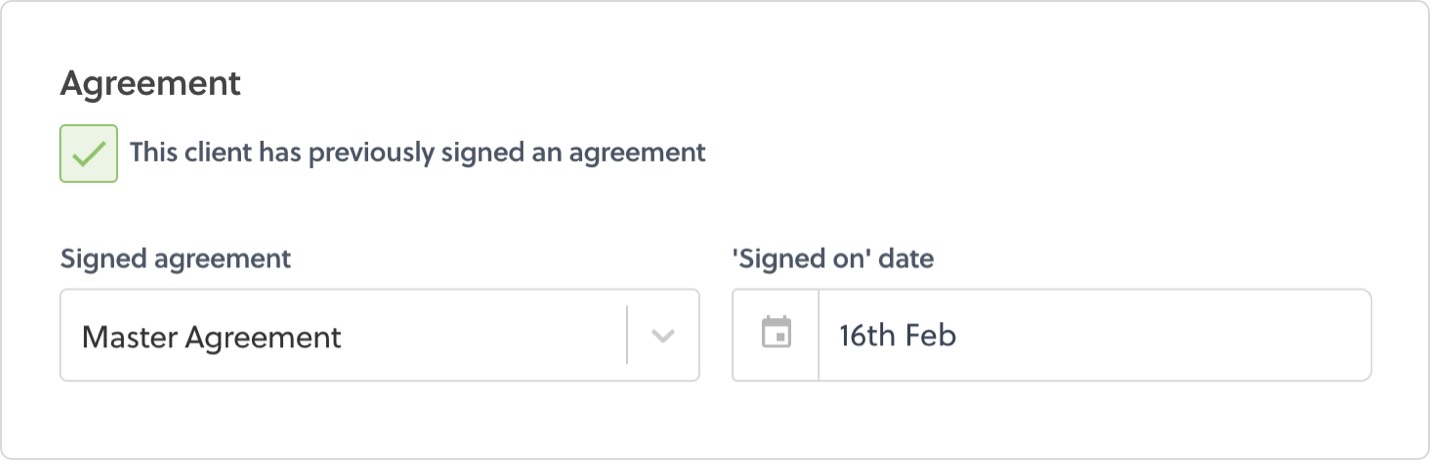
Existing agreements
If the client has already signed an agreement you can confirm this and add the date the agreement was signed on. This can be back dated if required.
Once the client is created you will be able to add session packs and class passes to this client. However for them to make their own purchases, bookings, and request sessions in your client area or the Striive app they must first create an account.
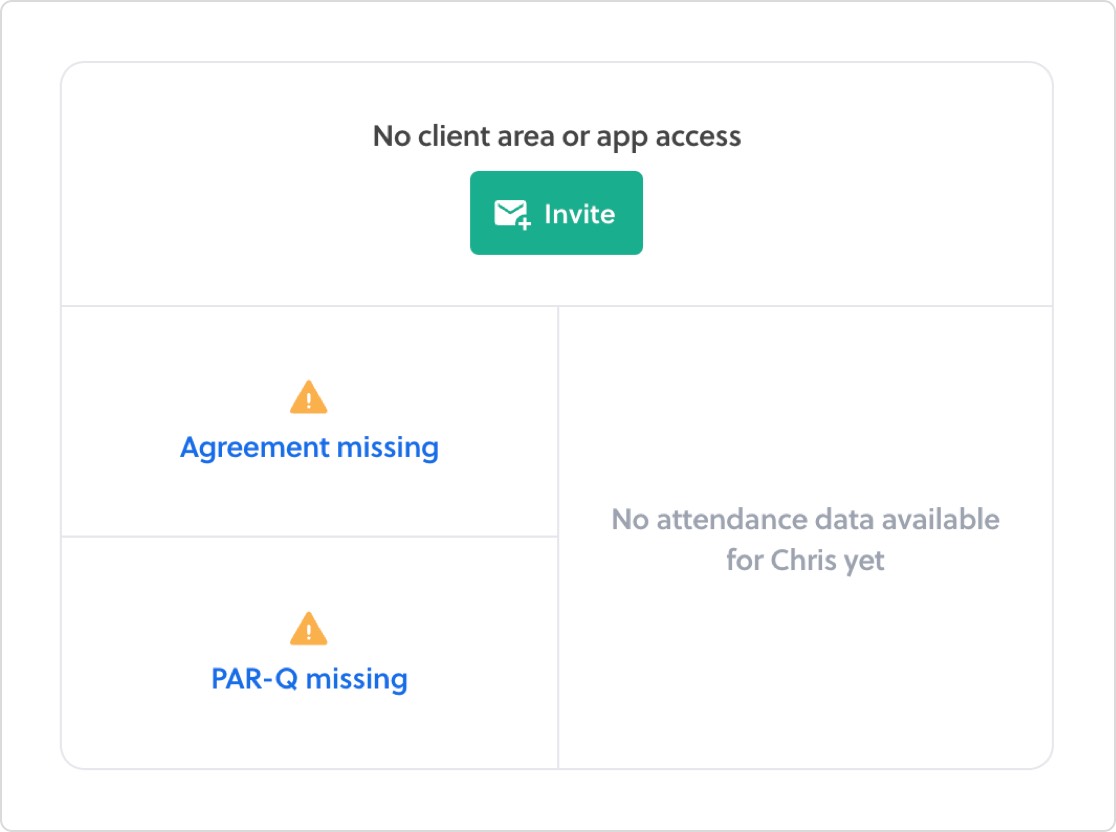
You can invite them to do this by clicking into the client and using the ‘+ invite’ button.
Here you can also view a clients agreement or PAR-Q, and send new ones to be completed. We will send you a notification when a client completes one and display the details in the ‘Awaiting review’ tab.
Once clients have created an account and signed an agreement, they can then see a copy in your client are or Striive client app for their reference.
Using your Public Sign up link
In the ‘Client area’ tab of your organisation settings there is the option to turn on your public sign up link. This allows new clients to sign up with you at any time without needing to be invited.
Use this link to:
- Create a sign up button on your existing website
- Add a sign up button to your social media profiles
- Share a sign up link in emails and messages
Enabling your link
To turn on your public sign up link go to the ‘Client area’ tab of your organisation settings. Scroll down to the 'Client sign up' section and click 'Enable public sign-ups'. This link will take clients and prospects through to the homepage of your Client Area where they can either sign up or sign in.
Your public sign-up link will be displayed in full for you to copy and use as you wish.
Your team members can also use the client area URL to create a sign up button on their social pages. Once clients have completed the sign up process the details will be sent to you, the organisation owner, to review.
Tip: Curious what the client sign up journey looks like? Find out here.